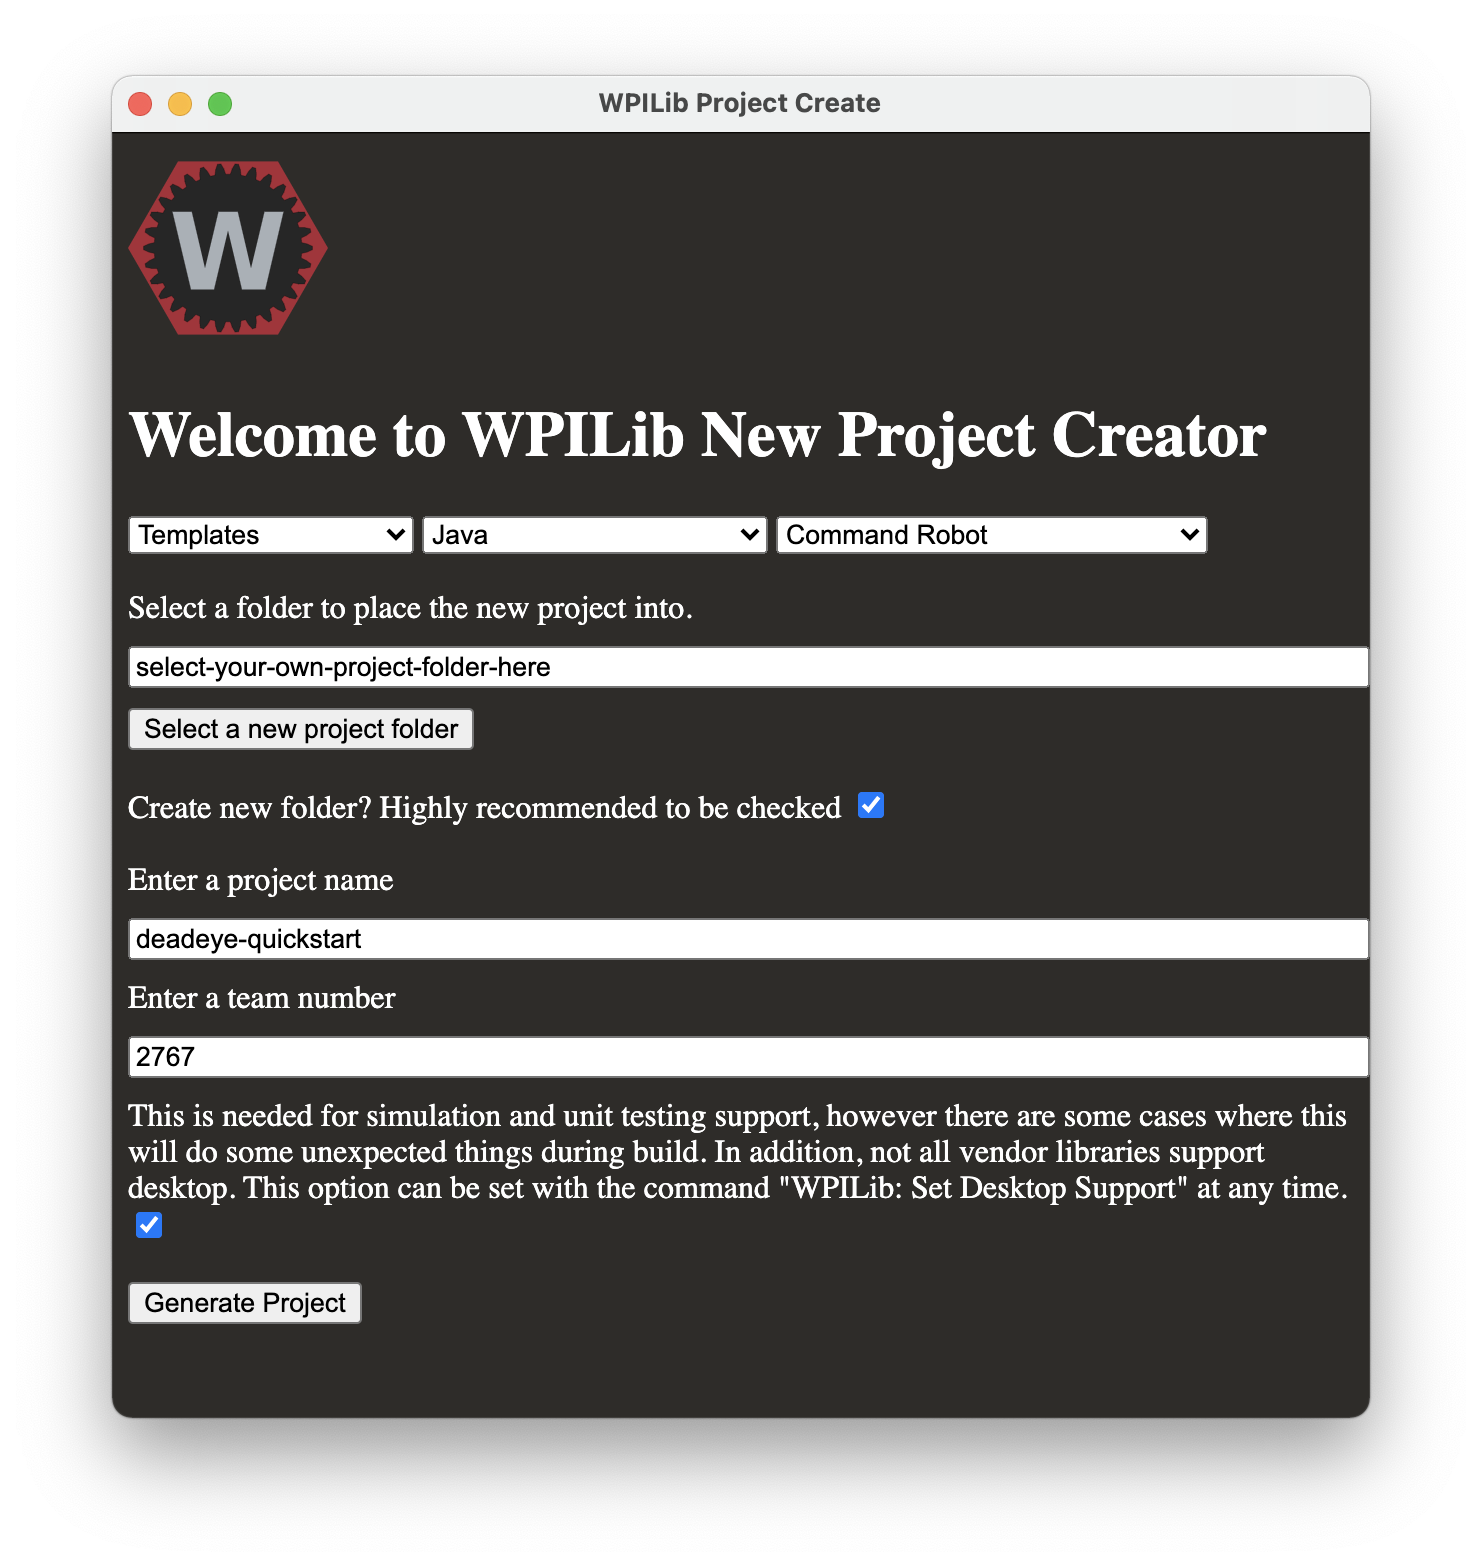
Create Robot Project
Deadeye provides a Java client library (javadocs) that can be used in FRC robot programs to control and receive data from a Deadeye vision co-processor. In this example, we'll use this library to connect to the Deadeye pipeline we just configured and print out data about the sample image's target.
Create Project
We'll assume you are using VS Code with the WPILib extension.
See the WPILib VS Code instructions for creating a robot program and use the following settings for the New Project Creator:

Add Deadeye Library
For FRC robot projects, the Java client library is provided via a vendordeps file:
Download from: http://maven.strykeforce.org/deadeye.json
To install, use VS Code ➔ Install new libraries (online) and provide the
deadeye.json URL above.
Alternatively, you can install manually to your project vendordeps directory or run the following Gradle task in your project directory to download and install the Deadeye vendor dependency file:
$ ./gradlew vendordep --url=http://maven.strykeforce.org/deadeye.json
Robot Example
We can now program our robot to access the Deadeye vision pipeline we just
configured above. Since the example above is a UprightRectPipeline for
Deadeye camera F0 (seen at top of admin dashboard page), we'll use this
information when programming our robot below.
Deadeye Camera Class
The recommended way to use the Deadeye client library is to create a class that
represents each Deadeye camera, DeadeyeF0 in our case.
Pipelines are designed to be used with their corresponding TargetData type,
so our deadeye::UprightRectPipeline uses a UprightRectTargetData:
Create src/main/java/frc/robot/subsystems/DeadeyeF0.java (replace F0 with
the camera you are actually using):
public class DeadeyeF0 implements TargetDataListener<UprightRectTargetData> {

  private final Deadeye<UprightRectTargetData> deadeye;

  public DeadeyeF0() {                                                // (1)
    deadeye = new Deadeye<>("F0", UprightRectTargetData.class);
    deadeye.setTargetDataListener(this);
  }

  public DeadeyeF0(NetworkTableInstance nti) {                        // (2)
    deadeye = new Deadeye<>("F0", UprightRectTargetData.class, nti);
    deadeye.setTargetDataListener(this);
  }

  public void setEnabled(boolean enabled) {                           // (3)
      deadeye.setEnabled(enabled);
  }

  @Override                                                           // (4)
  public void onTargetData(UprightRectTargetData data) {
      Point center = data.center;
      System.out.printf("x=%d, y=%d %n", center.x, center.y);
  }
}
(1) Create a new Deadeye object instance that will expect
UprightRectTargetData from camera F0 and that uses the default
NetworkTablesInstance. Register this object as the designated
TargetDataListener for camera F0.
(2) Alternate constructor you may use if you are not using the default
NetworkTablesInstance. Normally this is only needed when you are using a
Deadeye or robot simulator and you are using a separate stand-alone
NetworkTablesInstance for Deadeye. This repo contains an example of how to
use.
(3) Enabled or disable camera F0 pipeline. When enabled, the camera
lights will turn on and the pipeline will send target data.
(4) Implements TargetDataListener.onTargetData() and is called for every
camera frame processed through F0 pipeline. This example implementation
extracts the target center point and prints it.
Robot Class
Normally you would integrate the camera DeadeyeF0 class above into a robot
Subsystem and activate from a Command but we'll keep it simple for the
purposes of this example.
Make the following additions to the standard Robot class in
src/main/java/frc/robot/Robot.java.
Initialize our robot's DeadeyeF0 object in the robotInit() method.
private DeadeyeF0 deadeyeF0;

@Override
public void robotInit() {
  // ...
  deadeyeF0 = new DeadeyeF0();
}
Enable camera F0 when enabling the robot in tele-operation mode.
@Override
public void teleopInit() {
  // ...
  deadeyeF0.setEnabled(true);
}
And disable the camera when disabling the robot.
@Override
public void disabledInit() {
  deadeyeF0.setEnabled(false);
}
Deploy and Run
If your pipeline is tuned as above you should see target data for the sample image large target in the robot log when you enable the robot:
x=212, y=91
x=212, y=91